Using Images from the Picture Gallery as Custom Branch Shapes
You can give a branch shape the appearance of an image from the picture gallery through the following steps:
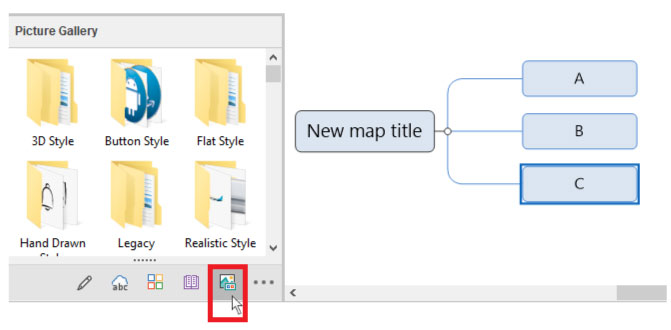
- Include the picture you want to use to the existing branch by selecting “Picture Gallery” at the bottom of the Notes Editor (Bottom left corner) – In the example below I chose a green arrow.
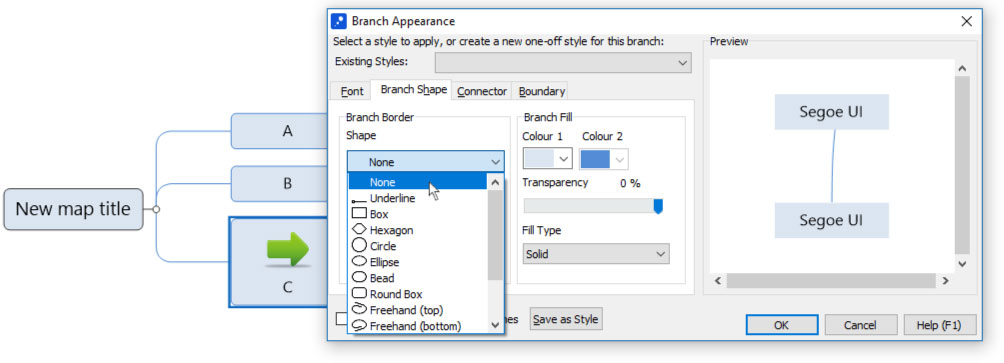
- Select your branch and strike the “F3” key on your keyboard to edit the branch appearance.
- Set your branch to appear invisible (i.e. Shape to “none”, branch fill colour to “none” and Transparency 99%.)
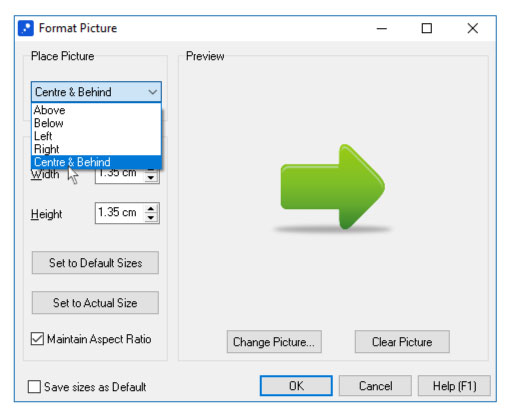
- Double click the image to bring up the “Format Picture” options, change “Place Picture” from “Above” to “Centre & Behind” and increase the picture size to ensure your branch text fits inside the image.
Insert Image from Picture Gallery
![using-images-from-the-picture-gallery-as-custom-branch-shapes | MindGenius | MindGenius using images from the picture gallery as custom branch shapes](https://www.mindgenius.com/wp-content/uploads/2019/06/using-images-from-the-picture-gallery-as-custom-branch-shapes.jpg)
Change Branch Appearance
![using-images-from-the-picture-gallery-as-custom-branch-shapes-2 | MindGenius | MindGenius using images from the picture gallery as custom branch shapes](https://www.mindgenius.com/wp-content/uploads/2019/06/using-images-from-the-picture-gallery-as-custom-branch-shapes-2.jpg)
Change Picture Format
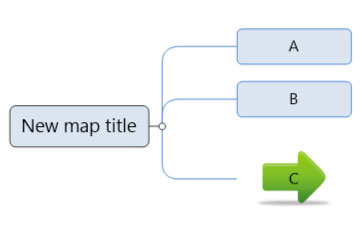
![using-images-from-the-picture-gallery-as-custom-branch-shapes-3 | MindGenius | MindGenius layout showing how to centre an image](https://www.mindgenius.com/wp-content/uploads/2019/06/using-images-from-the-picture-gallery-as-custom-branch-shapes-3.jpg)
The End Result
![using-images-from-the-picture-gallery-as-custom-branch-shapes-4 | MindGenius | MindGenius mind map sample image](https://www.mindgenius.com/wp-content/uploads/2019/06/using-images-from-the-picture-gallery-as-custom-branch-shapes-4.jpg)