STEP 4: CREATE A PLAN
Road maps can be structured in various ways, but in this example, we show a simple process that goes from Idea to either Done or Rejected. As ideas progress through the road map they pick up more and more detail as they become understood.
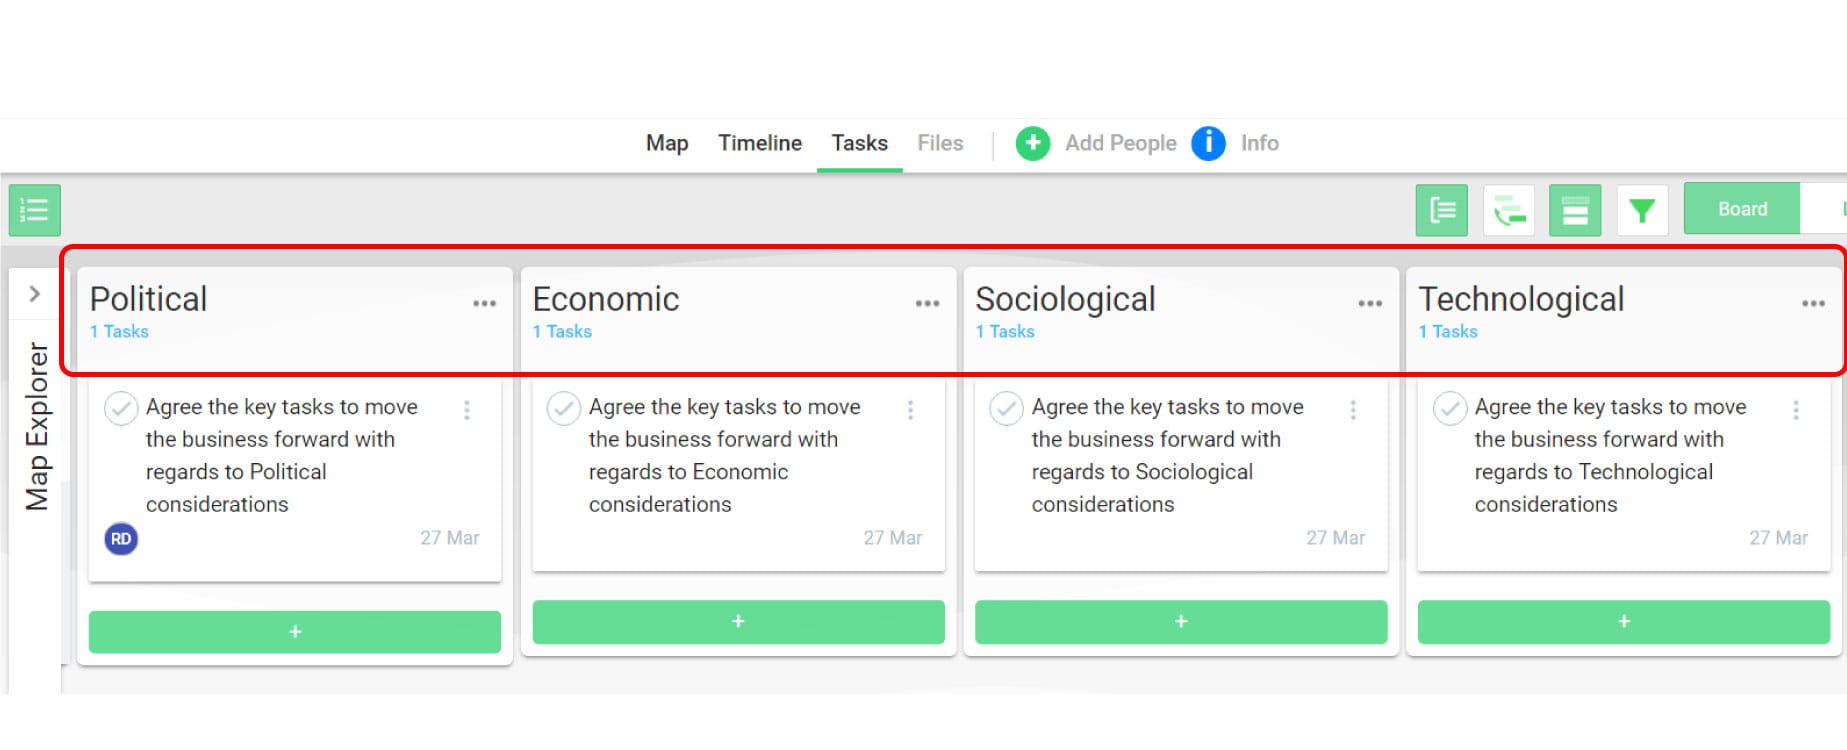
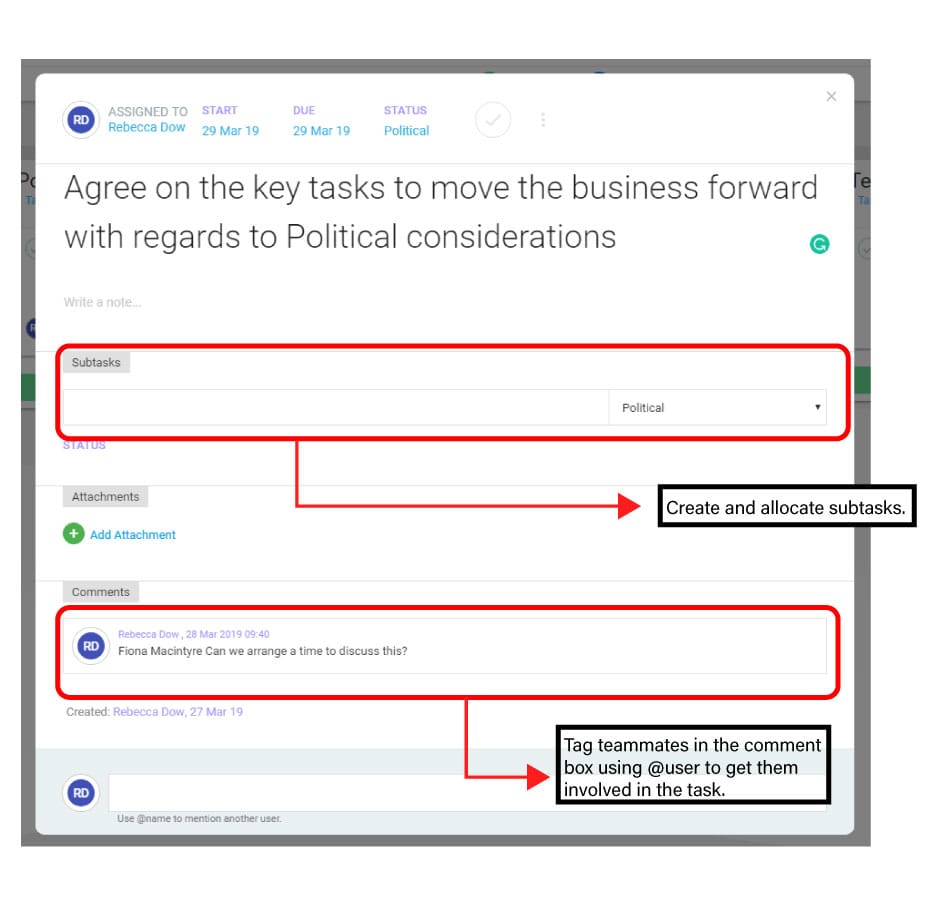
The Task Board is designed to bring a high degree of visibility, process flow and all-important tracking to this stage. Task Cards are used to record the key task properties / data, including owner, start date, due date and status. Progress of Tasks through a pre-determined journey is visualised and tracked by simply moving the cards along “swim lanes.
Once again, the Template has been pre-populated to give you some idea of how MindGenius Online can manage the process. However, you can customise the “swim lane” headings to adapt or create your own process / project flow or journey through to completion.
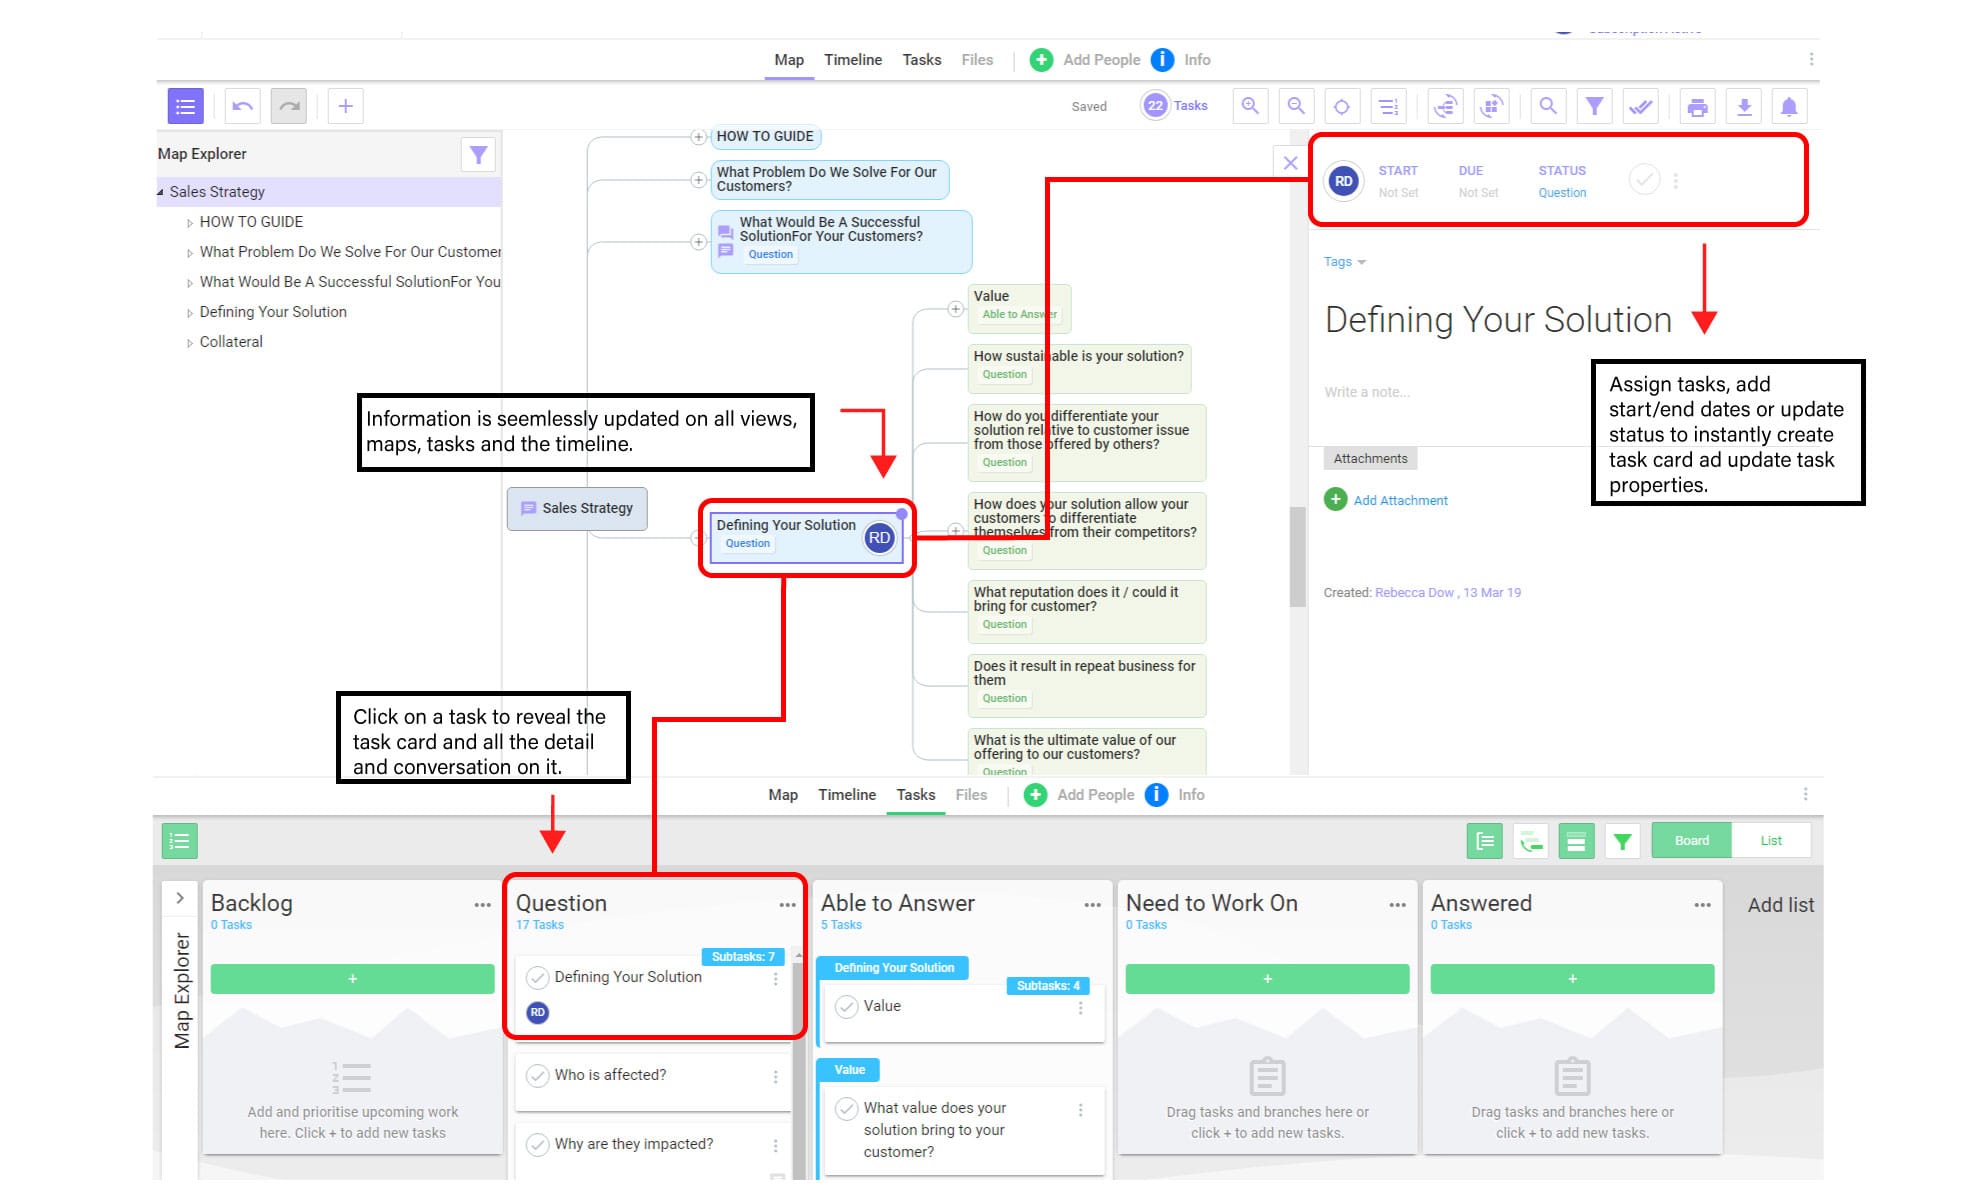
You will note that any Tasks created using the mapping interface have been synchronised through to the Task Board. You can, of course, add new Task Cards within the Task Board simply by using the green + icons.
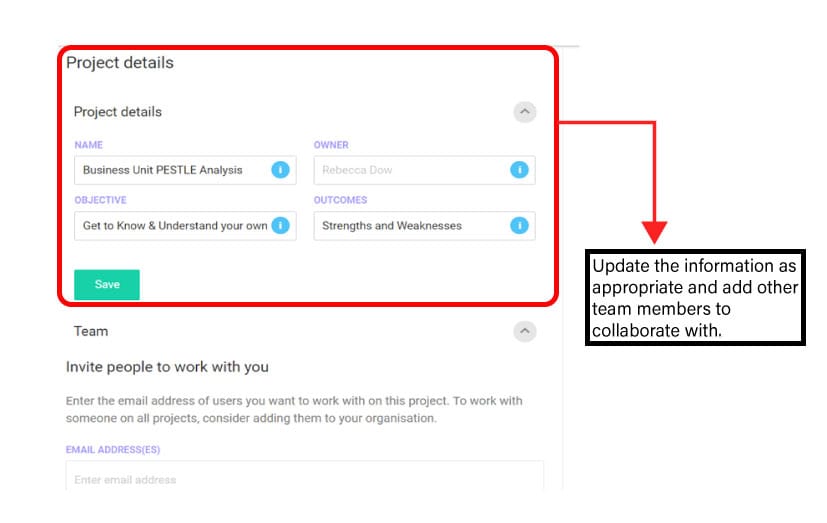
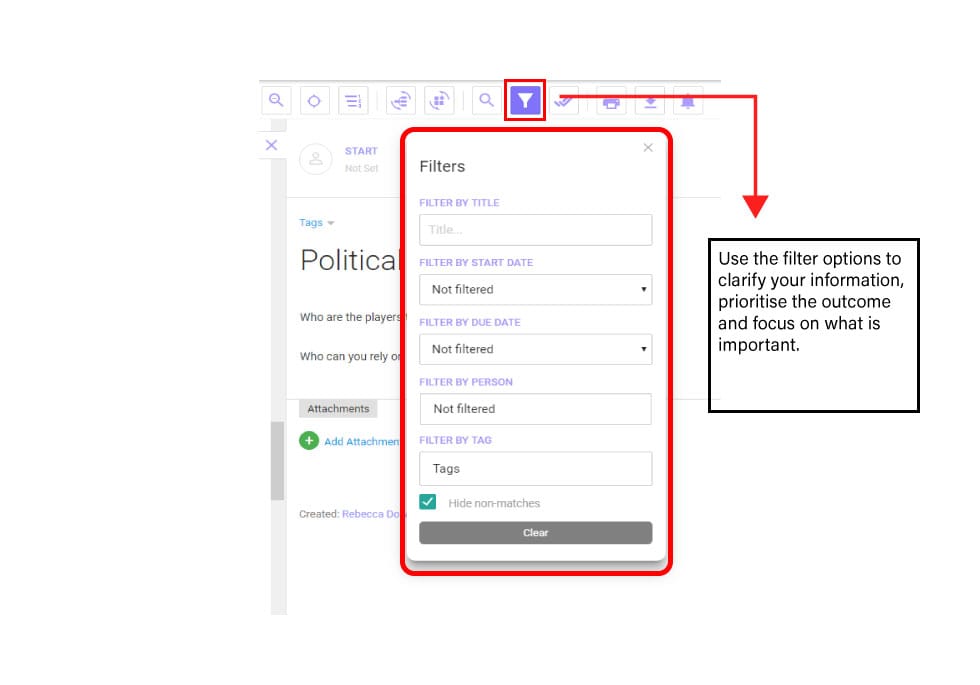
MindGenius Online provides the ability to create Tasks, including assigning ownership, timescales and deadlines.
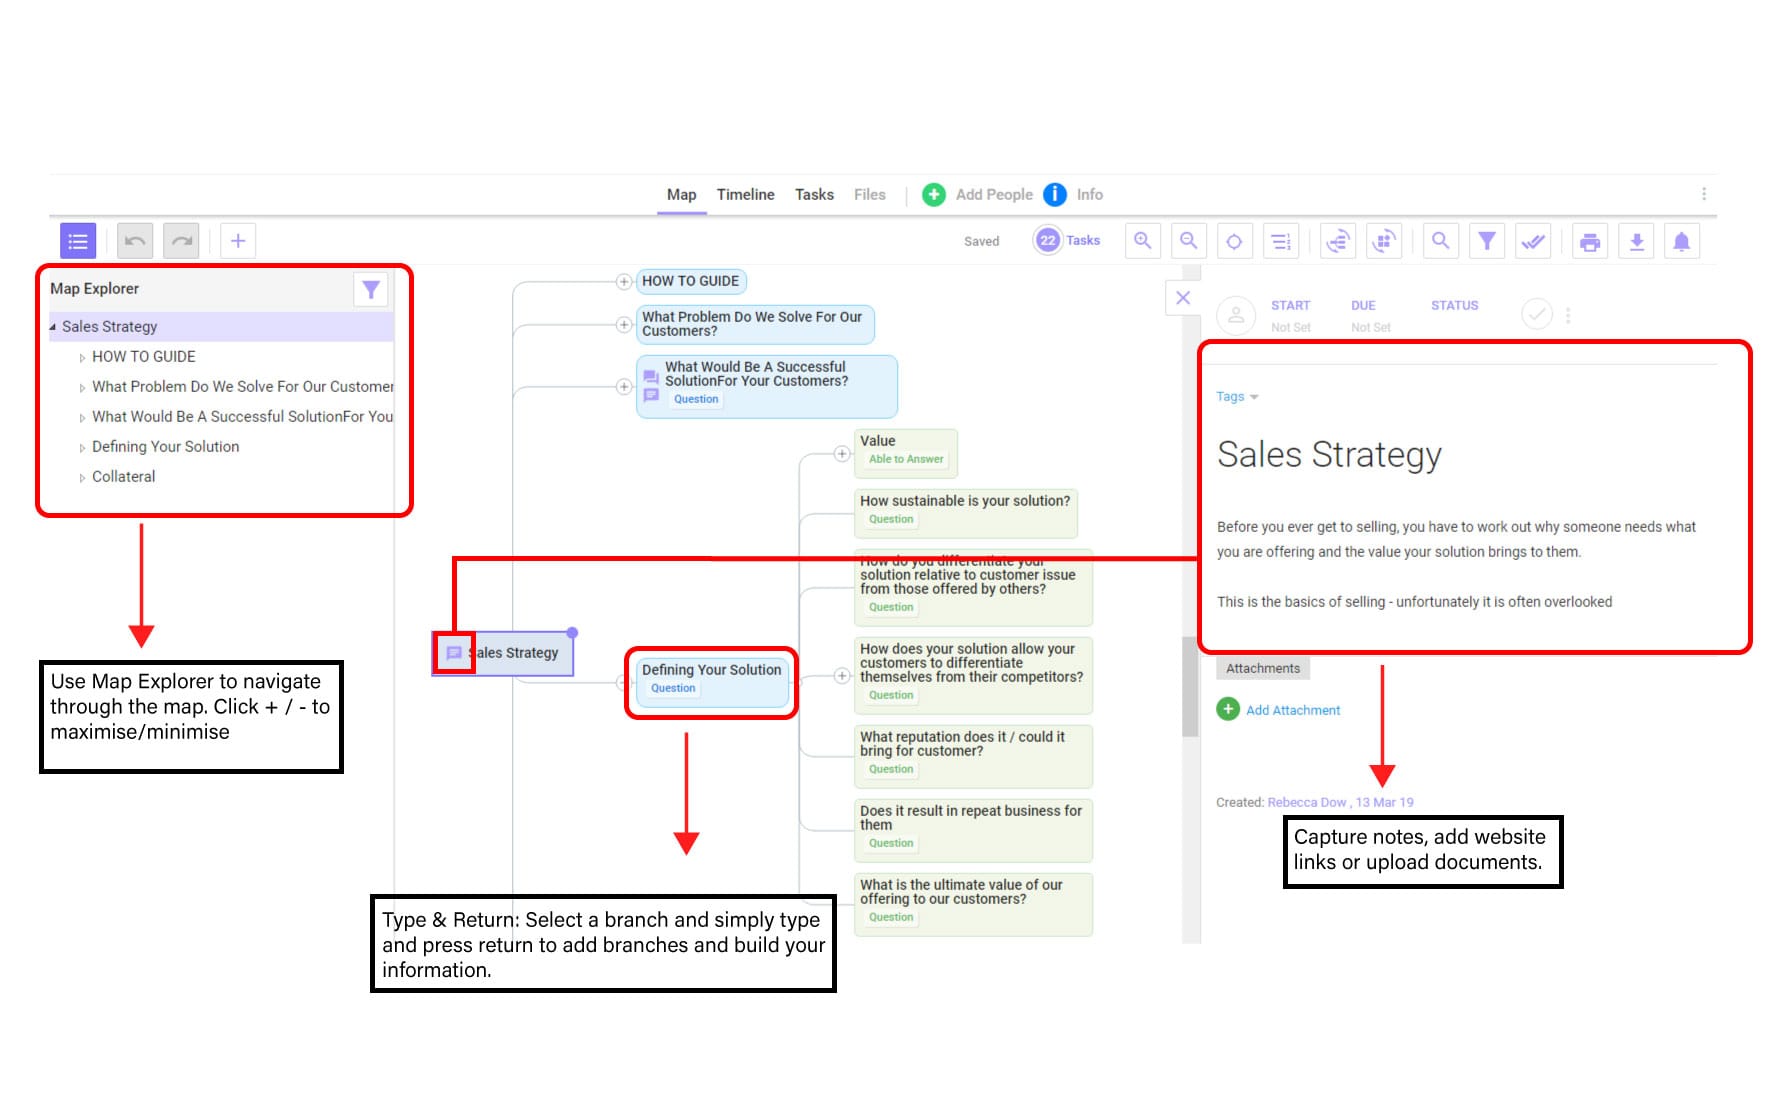
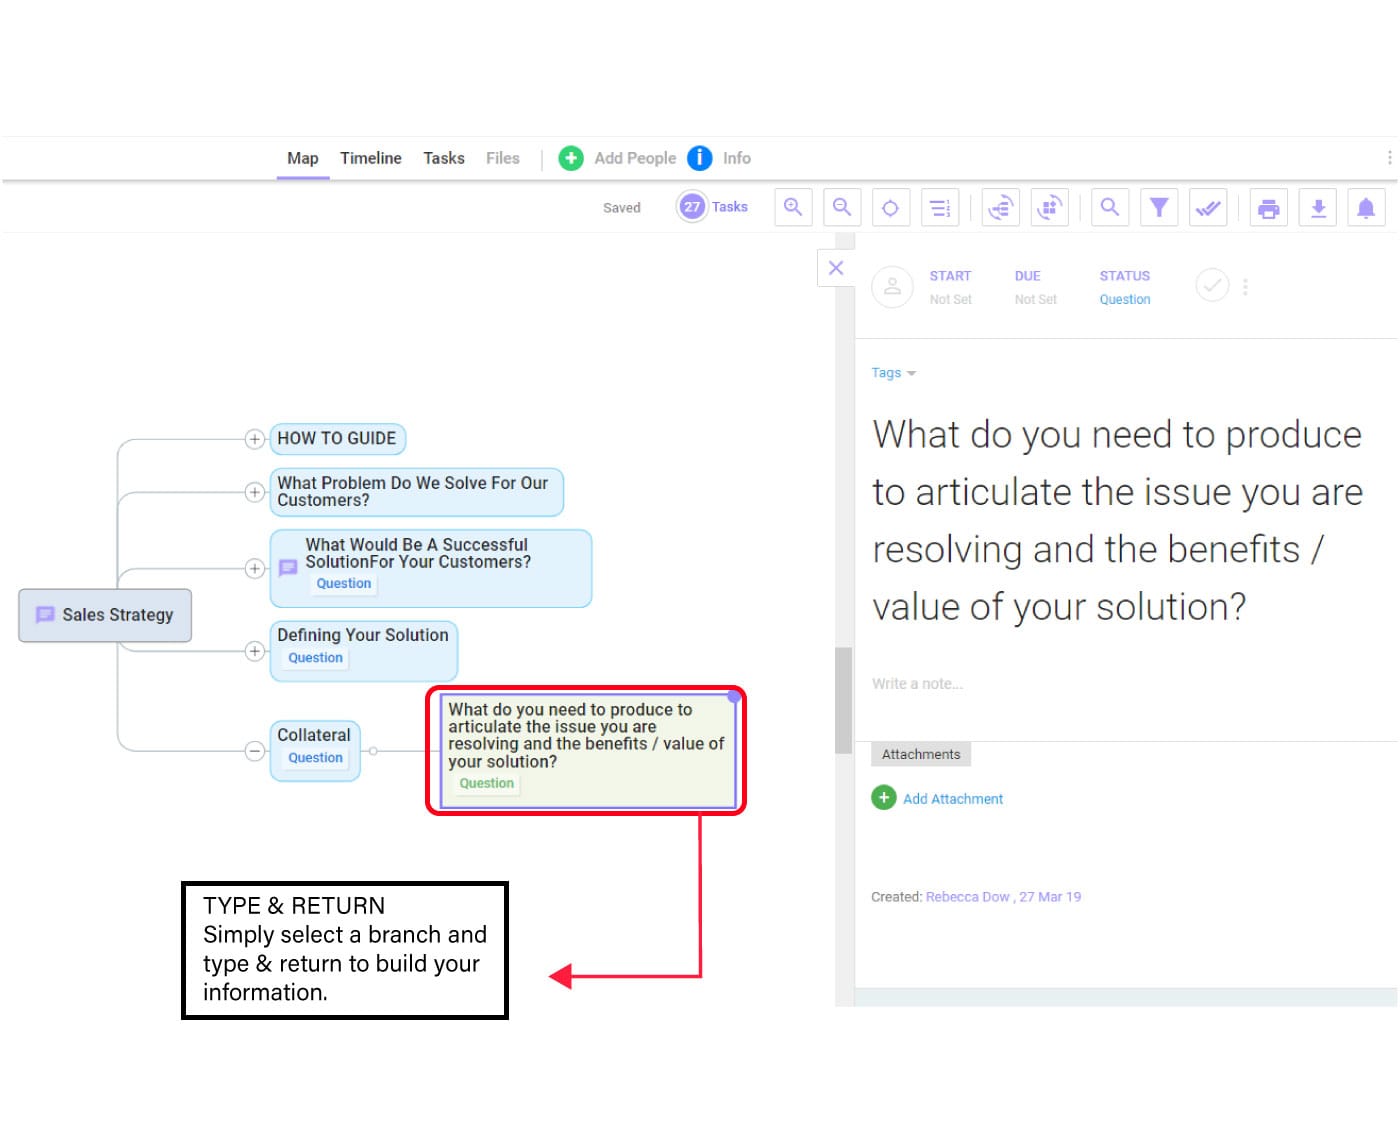
Task information can easily be applied to map Branches (as shown pre-populated in the Template) and / or using the Task Board (Tasks tab).
Tasks added to a Map are automatically added as Task Cards to the MindGenius Online Task Board.
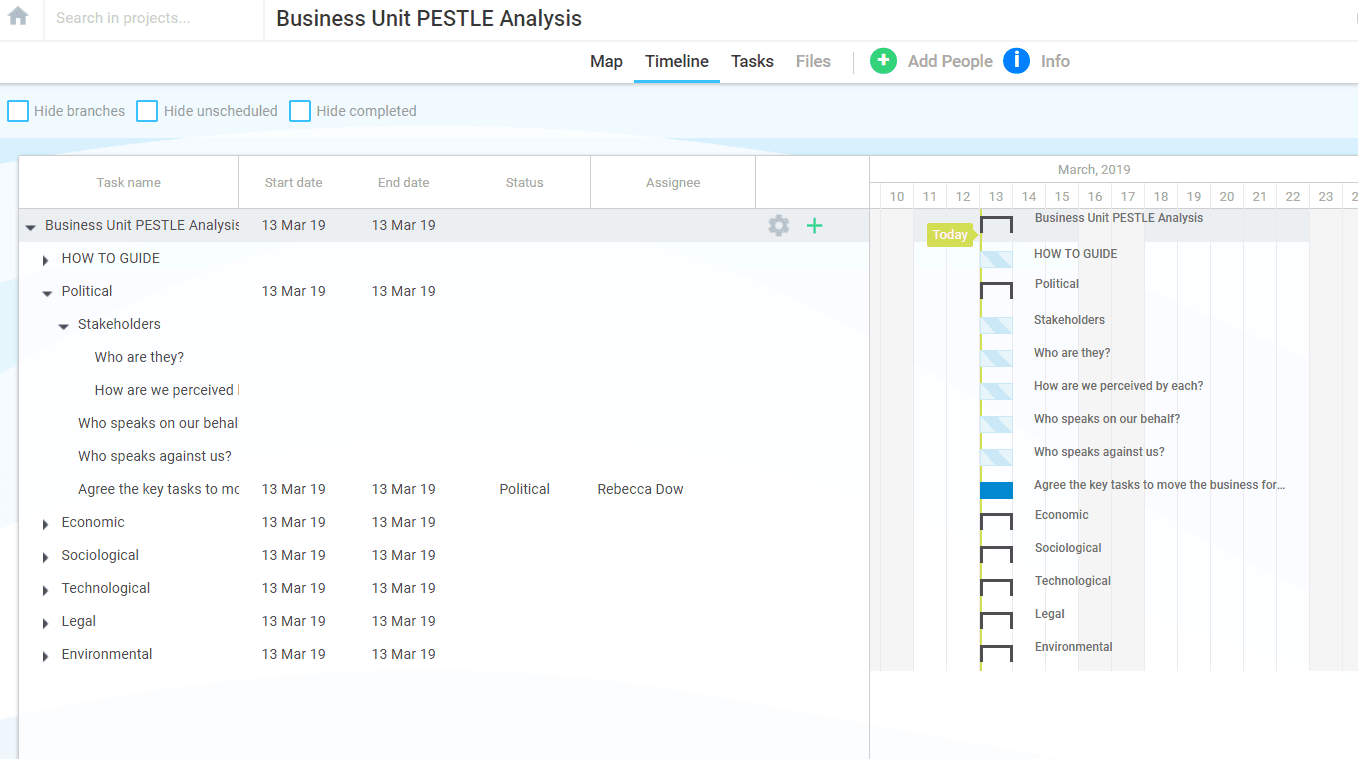
As start and end dates are added to the task cards the timeline will also give an alternative view for understanding the project current status. The example shown (from the Template) shows how the Timeline has interpreted the Task Start and End Dates from the Task Cards, but importantly portraying the project data in an alternative view to aid understanding of the overall project flow and current status.